There were a couple ways I had in mind in which I could present my live session videos. The first would be to string them all together in one video, creating transitions to link each different location to create a longer and more stylised video edit. The second way would be to produce each location as a seperate video, exploring slightly different editing techniques and colour grading within each one.
I felt that this option was the best as it meant I could produce multiple videos based on the same idea and also it would hold viewer retention much better as you could watch each video individually instead of watching the extended cut in one sitting.
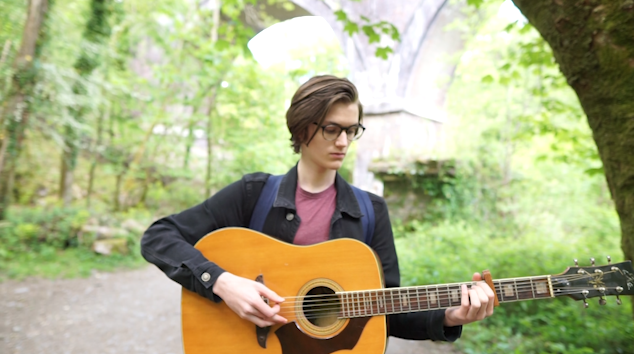
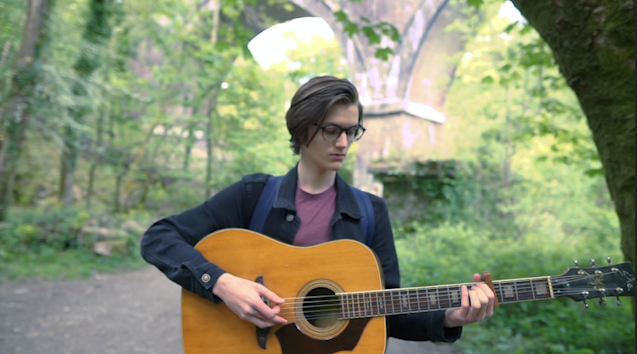
The first video I have started editing was filmed deep within Plymbridge woods in a clearing adjacent to a tall, stooping cliff. We found this spot whilst location scouting and decided it would be a perfect place to shoot the live session for his song “shooting up with all your friends.

Here is the video I produced for Tim’s first song in his ep “The world looks different with sound” Since this was shot in a forest, the first out of three locations for this project, we had to prepare a lot of equipment to record, film and produce the short live session.
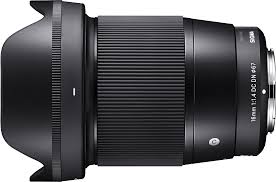
Some of the equipment we used for this shoot included; a handheld Zhyiun gimbal, a Sony a6000, Sony 16mm F1.4 M lens, Zoom H4N Pro, two different studio microphones each paired with stands.


Our aim was to create a smooth and chilled visual style with slow pacing and an ominous location to match the songs genre. This overall creates a more cohesive atmosphere across the whole live session therefore engaging the viewer further into the video. The use an ultra-wide angle lens, in this case the 16mm F1.4, was also another attribute we wanted this live session to take on. The reason for this was the wide FOV brings the viewer closer to the action, in turn creating a similar perspective to that of actually standing in the forest, listening to Tim’s song.
The handheld gimbal allowed me to get buttery-smooth shots and slow rotational movement around Tim without any shake. This is important to make sure the shot is not jarring in anyway as to keep the viewer’s immersion. It also removes any distracting elements which would take away from the goal of achieving the “chilled” aesthetic we want.
The lens was amazing especially paired with the a6000 camera. I borrowed the lens and camera from a friend as I did not own an F1.4 lens of a wide focal length. The 16mm was something I wanted to use to achieve the desired effect shown similarly in a separate live session video I researched, created by the ” Hollow Coves”.
The F1.4 aperture would allow me to isolate the subject, in this case Tim, from the background, therefore giving the video a direct focus point whilst also adding a visually appealing blurred background.

The Filming:
Once we found the location Tim proceeded to set up the microphones whilst I choreographed a route the gimbal would take for the establishing shot. Since there was a large space I wanted to camera to capture the vastness and height of the cliff whilst being able to still move in close to see Tim playing his song. This was the main reason the Zhyiun crane was used.
We did multiple takes within the clearing with ranging heights, speeds and angles. There were quite a few outtakes as Tim found the way I was advancing towards him to be hilarious. Although at times this was frustrating I felt it didn’t effect the time it took to produce the perfect shot we wanted as each run allowed me to improve my technique better.
In the second shot you can not only see that whilst moving towards Tim the camera is extremely shaky, due to an issue within the gimbals stabilisers, but around a minute into performing the song a string got caught under the frets of the guitar. Although Tim tried to deal with this issue whilst simultaneously playing the guitar he couldn’t manage to fix it. This was again very annoying however it abled Tim to have more practices singing the song before we felt the perfect session was recorded.
Editing:
Edit 1:
The first part of the editing process was to apply Tim’s recorded audio over the video track and match them together so that they played at the correct time. A video can become almost impossible to watch if the audio tracks are not synced up properly.
The editing of this first video edit was fairly simple but took a lot of time to colour grade in a way that I was personally happy with.
After this I proceeded to apply an intro and outro effect to both the audio and video to once again make the video less jarring. I started with a blank screen with the typography “shooting up with all your friends” which slowly faded into the gimbal shot moving towards Tim. For the outro I also applied a dip to black effect to fade the video out in a similar way. The exponential fade effect was then applied to the audio to create a gradual space for the audio to fade out. I often find that when a video ends abruptly it leaves a noticeable jarring effect on me and therefore I make sure to avoid these in my own edits by applying the fade.
The last thing I edited in this live session video was a slight warp stabilise effect to the whole shot. Whilst the gimbal was amazing at keeping any shake from entering the video, applying the warp stabiliser still greatly
increases the production quality of the motion and creates a more proffesional look.
Edit 2:
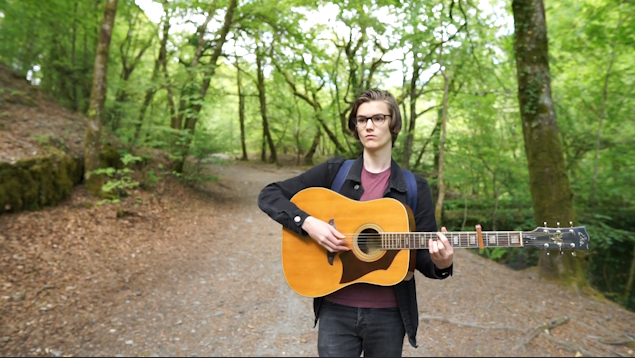
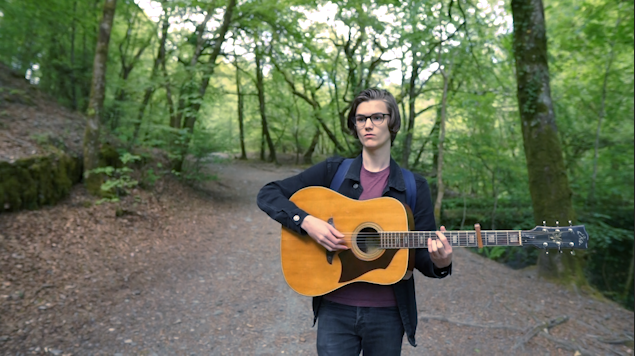
The second location/live session idea was inspired by Mac DeMarco. He produced a song whilst walking around a park playing his guitar in the open while people were walking past. Tim and I both agreed that this was a cool style in which we wanted to emulate and so therefore picked a route through Plymbridge woods and started shooting.
One issue with this kind of video was that we could not use any microphones as there was no places to mount them on the guitar or Tim. This meant that we would have to produce this instrumental which was played and overlay it on the video track within premiere. As stated the equipment we used for this one shot video was much more refined than the first location however we still used the same gimbal, camera and lens for all the same reasons. The gimbal was necessary to create a smooth shot, especially whilst moving backwards along the path in the forest.
The colour grading process for this shot was much more difficult then the first video. Since we were not shooting in a static position the brightness of the sun was changing at varying degrees throughout the video, causing overexposed areas which needed to be fixed. I applied an adjustment layer across the whole track and started key framing areas which needed highlights reducing and increasing. By adding these key frames it creates a smooth speed ramp from where the highlights can change gradually rather than all at once, ensuring that there is no sudden flash or darkening of light levels in the composition.

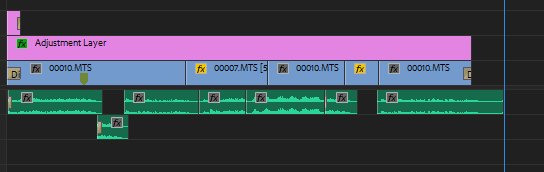
Here you can see the timeline of the edit on premiere pro. Since Tim recorded the audio of the instrumental at a separate time to the forest location, it was very hard to match all of the strumming and picking of the guitar to the music. This was a major problem which I had to find a solution to as the audio and video wasn’t synced in its first editing stages.
Although I wanted this edit to be a one shot video, the desync meant that in some areas I had to apply b-roll over the top of the footage where it was impossible to sync. This whole process took a lot of trial and error by using certain clips and tracks to overlay the footage to make it look as polished as possible.
The final edit is not perfect however I spent many hours trying my hardest to find the best solution and decided that I had learnt a very good lesson to keep in mind for future projects.
Colour Grading:
Before: After:
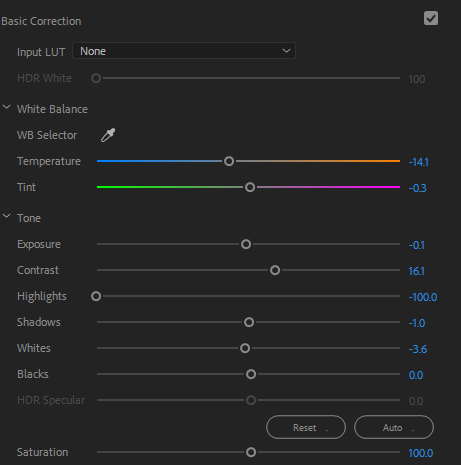
Within these two screenshots you can see the amount of difference correctly adjusting the exposure and tint values does to the shots. The background is completely blown out however after toying with the highlights and shadows I managed to bring back as much detail in the background as possible whilst trying to minimally effect the grain and detail on Tim.
Before: After:
The yellow tinge was very apparent on the non adjusted video and In my opinion was very harsh to watch. The highlights in the gaps between the trees was also very bright and by balancing both of these made the shot much more appealing.
Edit 3:
The third edit we filmed was on Tim’s balcony. The composition of the shot showed the window reflecting Tim playing the guitar with the sky and trees in the background.
After this film session we drove to our forest location and formatted the card to make space for filming. I hadn’t backed up the SD card and therefore that location had been sadly deleted. We decided that although the balcony scene looked impressive, it didn’t fit in well with the locations out in the forest. Our decision was to cut out this scene instead of re-shooting it.
