Over the course of the 8 weeks my base idea has stayed relatively the same however due to a few inevitable hiccups it has caused some of the aspects such as location and edit style to change.
I feel that I have achieved my desired aim in making two edits in order to promote Tim’s EP. Both edits though very simply edited, reached their goal of being calm and soothing, which was the main attribute I wanted both edits to take on. The duality of the audio and visual styles and how they perfectly accent each other is another thing I am particularly proud of.
When comparing my final product with my first proposal, it is clear I fell short of producing three linked songs in one large edit for Tim’s EP. This was for a number of reasons. The first was that a scene filmed on Tim’s balcony as part of the “Midday” section was deleted from my cameras SD card. We decided that this was something we would have to move on from by continuing to film the other locations and adjust our proposals accordingly.
Another area I felt was very tricky to overcome was syncing the audio to the video of the one-shot instrumental. This took many hours of trial and error and was possibly one of the hardest edits I have had to manipulate.
Due to already losing the balcony scene I did not want to give up on a second song as this would further weaken my project and greatly diminish my chances of receiving a high grade I worked so hard towards. The last area I felt I could have done better in is the deconstruction of my first edit in my blog. I had no ability to include screenshots of the premiere pro timeline sequence as this file had been lost from changing editing locations between college and home.
There are some areas I feel I could improve in when doing this project in the second year. I would still keep the original proposal slightly overambitious as this would give me something to try and reach for rather than creating a project within my comfort zone. This project I worked with a friend, Tim, and whilst this was useful to help generate ideas and produce something I would never personally have the skills to do, I feel working by myself would be much easier and less time-consuming as I wouldn’t have to pass any idea changes or decisions by another person.
The time between the start of the project and Tim finishing his songs took longer than I had expected. As this was the first project based around music I have produced my concept of how long songs took to create and finish was naive. The first few weeks of the project I left Tim to his own devices to write and perfect his songs whilst I produced research in aid of visualising a style I wanted to replicate. I found out that after this time Tim had only just finished the final renditions of his lyrics and hadn’t yet perfected the sound or chords he would play them with on his guitar. This left me with only one choice but to carry on researching, analysing and planning locations so that I was ready to film exactly when Tim was finished. This was the reason we felt it was too ambitious to re shoot the balcony scene as there were too many time constraints in order for us to successfully plan, shoot and edit this scene again. Realising this has taught me how important communication is and is something I will definitely plan to improve on in the future.
My second research post aimed to develop my skills in editing and is what I produced in the time whilst Tim was still refining his songs. I spent a day practising by using the gimbal and getting shots of the city of Plymouth. I then emulated the editing style of JR alli and produced a three minute video which included in depth transitions and other simple masks to create a short piece which would be included as part of my research. I had some feedback from others and although they found this particular video edit more interesting than the live session videos, much more planning and construction was built around the live session in order to make the visual and audio aspects resonate perfectly with each other.
Overall I believe this project has been a success and I have worked very carefully in order to work around issues which were brought up throughout the course of the project.
There were a couple ways I had in mind in which I could present my live session videos. The first would be to string them all together in one video, creating transitions to link each different location to create a longer and more stylised video edit. The second way would be to produce each location as a seperate video, exploring slightly different editing techniques and colour grading within each one.
I felt that this option was the best as it meant I could produce multiple videos based on the same idea and also it would hold viewer retention much better as you could watch each video individually instead of watching the extended cut in one sitting.
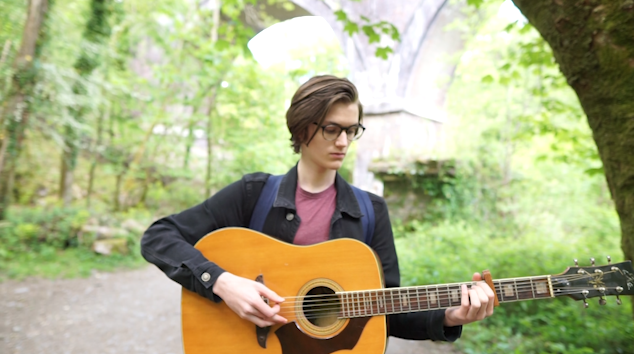
The first video I have started editing was filmed deep within Plymbridge woods in a clearing adjacent to a tall, stooping cliff. We found this spot whilst location scouting and decided it would be a perfect place to shoot the live session for his song “shooting up with all your friends.
Here is the video I produced for Tim’s first song in his ep “The world looks different with sound” Since this was shot in a forest, the first out of three locations for this project, we had to prepare a lot of equipment to record, film and produce the short live session.
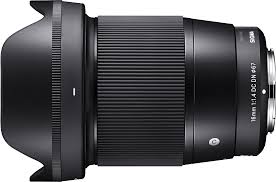
Some of the equipment we used for this shoot included; a handheld Zhyiun gimbal, a Sony a6000, Sony 16mm F1.4 M lens, Zoom H4N Pro, two different studio microphones each paired with stands.
Our aim was to create a smooth and chilled visual style with slow pacing and an ominous location to match the songs genre. This overall creates a more cohesive atmosphere across the whole live session therefore engaging the viewer further into the video. The use an ultra-wide angle lens, in this case the 16mm F1.4, was also another attribute we wanted this live session to take on. The reason for this was the wide FOV brings the viewer closer to the action, in turn creating a similar perspective to that of actually standing in the forest, listening to Tim’s song.
The handheld gimbal allowed me to get buttery-smooth shots and slow rotational movement around Tim without any shake. This is important to make sure the shot is not jarring in anyway as to keep the viewer’s immersion. It also removes any distracting elements which would take away from the goal of achieving the “chilled” aesthetic we want.
The lens was amazing especially paired with the a6000 camera. I borrowed the lens and camera from a friend as I did not own an F1.4 lens of a wide focal length. The 16mm was something I wanted to use to achieve the desired effect shown similarly in a separate live session video I researched, created by the ” Hollow Coves”.
The F1.4 aperture would allow me to isolate the subject, in this case Tim, from the background, therefore giving the video a direct focus point whilst also adding a visually appealing blurred background.
The Filming:
Once we found the location Tim proceeded to set up the microphones whilst I choreographed a route the gimbal would take for the establishing shot. Since there was a large space I wanted to camera to capture the vastness and height of the cliff whilst being able to still move in close to see Tim playing his song. This was the main reason the Zhyiun crane was used.
We did multiple takes within the clearing with ranging heights, speeds and angles. There were quite a few outtakes as Tim found the way I was advancing towards him to be hilarious. Although at times this was frustrating I felt it didn’t effect the time it took to produce the perfect shot we wanted as each run allowed me to improve my technique better.
In the second shot you can not only see that whilst moving towards Tim the camera is extremely shaky, due to an issue within the gimbals stabilisers, but around a minute into performing the song a string got caught under the frets of the guitar. Although Tim tried to deal with this issue whilst simultaneously playing the guitar he couldn’t manage to fix it. This was again very annoying however it abled Tim to have more practices singing the song before we felt the perfect session was recorded.
Editing:
Edit 1:
The first part of the editing process was to apply Tim’s recorded audio over the video track and match them together so that they played at the correct time. A video can become almost impossible to watch if the audio tracks are not synced up properly.
The editing of this first video edit was fairly simple but took a lot of time to colour grade in a way that I was personally happy with.
After this I proceeded to apply an intro and outro effect to both the audio and video to once again make the video less jarring. I started with a blank screen with the typography “shooting up with all your friends” which slowly faded into the gimbal shot moving towards Tim. For the outro I also applied a dip to black effect to fade the video out in a similar way. The exponential fade effect was then applied to the audio to create a gradual space for the audio to fade out. I often find that when a video ends abruptly it leaves a noticeable jarring effect on me and therefore I make sure to avoid these in my own edits by applying the fade.
The last thing I edited in this live session video was a slight warp stabilise effect to the whole shot. Whilst the gimbal was amazing at keeping any shake from entering the video, applying the warp stabiliser still greatly increases the production quality of the motion and creates a more proffesional look.
Edit 2:
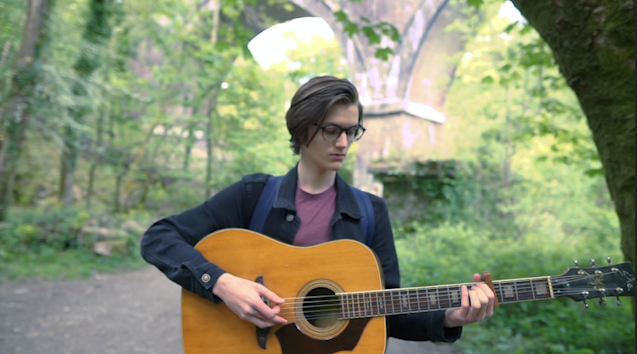
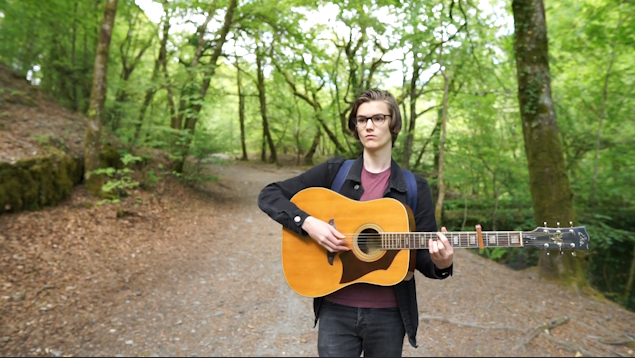
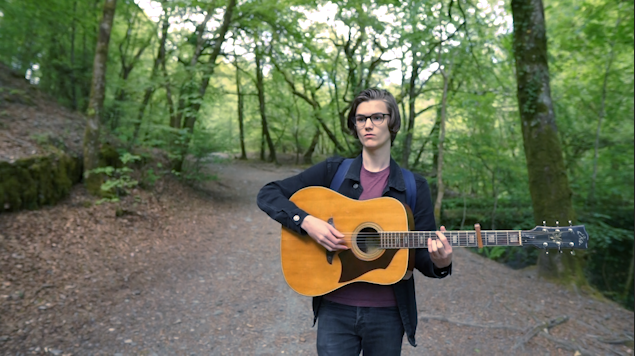
The second location/live session idea was inspired by Mac DeMarco. He produced a song whilst walking around a park playing his guitar in the open while people were walking past. Tim and I both agreed that this was a cool style in which we wanted to emulate and so therefore picked a route through Plymbridge woods and started shooting.
One issue with this kind of video was that we could not use any microphones as there was no places to mount them on the guitar or Tim. This meant that we would have to produce this instrumental which was played and overlay it on the video track within premiere. As stated the equipment we used for this one shot video was much more refined than the first location however we still used the same gimbal, camera and lens for all the same reasons. The gimbal was necessary to create a smooth shot, especially whilst moving backwards along the path in the forest.
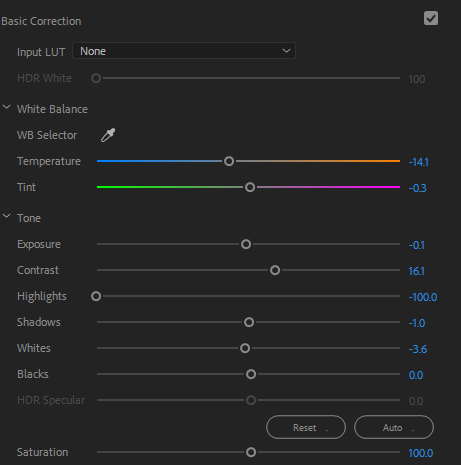
The colour grading process for this shot was much more difficult then the first video. Since we were not shooting in a static position the brightness of the sun was changing at varying degrees throughout the video, causing overexposed areas which needed to be fixed. I applied an adjustment layer across the whole track and started key framing areas which needed highlights reducing and increasing. By adding these key frames it creates a smooth speed ramp from where the highlights can change gradually rather than all at once, ensuring that there is no sudden flash or darkening of light levels in the composition.
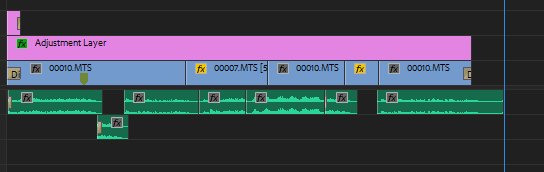
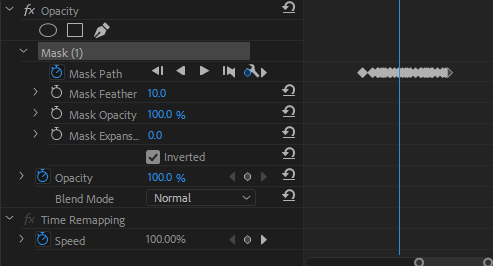
Here you can see the timeline of the edit on premiere pro. Since Tim recorded the audio of the instrumental at a separate time to the forest location, it was very hard to match all of the strumming and picking of the guitar to the music. This was a major problem which I had to find a solution to as the audio and video wasn’t synced in its first editing stages.
Although I wanted this edit to be a one shot video, the desync meant that in some areas I had to apply b-roll over the top of the footage where it was impossible to sync. This whole process took a lot of trial and error by using certain clips and tracks to overlay the footage to make it look as polished as possible.
The final edit is not perfect however I spent many hours trying my hardest to find the best solution and decided that I had learnt a very good lesson to keep in mind for future projects.
Colour Grading:
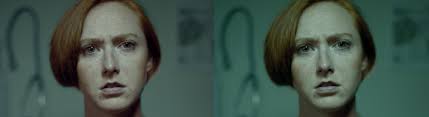
Before: After:
Within these two screenshots you can see the amount of difference correctly adjusting the exposure and tint values does to the shots. The background is completely blown out however after toying with the highlights and shadows I managed to bring back as much detail in the background as possible whilst trying to minimally effect the grain and detail on Tim.
Before: After:
The yellow tinge was very apparent on the non adjusted video and In my opinion was very harsh to watch. The highlights in the gaps between the trees was also very bright and by balancing both of these made the shot much more appealing.
Edit 3:
The third edit we filmed was on Tim’s balcony. The composition of the shot showed the window reflecting Tim playing the guitar with the sky and trees in the background.
After this film session we drove to our forest location and formatted the card to make space for filming. I hadn’t backed up the SD card and therefore that location had been sadly deleted. We decided that although the balcony scene looked impressive, it didn’t fit in well with the locations out in the forest. Our decision was to cut out this scene instead of re-shooting it.
As another way of improving and refining my editing skills I decided to produce a short edit in the style my favourite visual editor on youtube; JR Alli.
JR Alli produces videos ranging from 1-2 minutes which include high amounts of attention to detail. His edits focus of quality rather than quantity and take a long time to produce his desired effects. He focuses on audio production in his videos which overall tie his videos together more and in turn make it more cohesive.
One particular audio trick he applies to his edits is positioned very carefully within each shot. An example of this; a bicycle bell sounds just before the transition into the next shot where a bike appears to be passing by. The use of applying the sound effect before the actual shot of the bike makes the shots seem extremely interwoven and carefully planned, creating a professional and unified visual style.
Here is one of his videos. After Effects is soley used for his edits in order for him to be able to manipulate his shots easier. Some of the shots I wanted to emulate were his fast paced hyperlapses. This can easily be achieved by using a gimbal as it keeps the camera in a static position whilst still moving closer to the subject.
Tranistions are a very important part of his editing style which make him stand out. He uses a variotion of presets and custom masking transitions in each individual shot to make his videos flow in the way he chooses. Masking is cleverly used to combine shots and is also used in place of transitions in certain shots.
My Emulation:
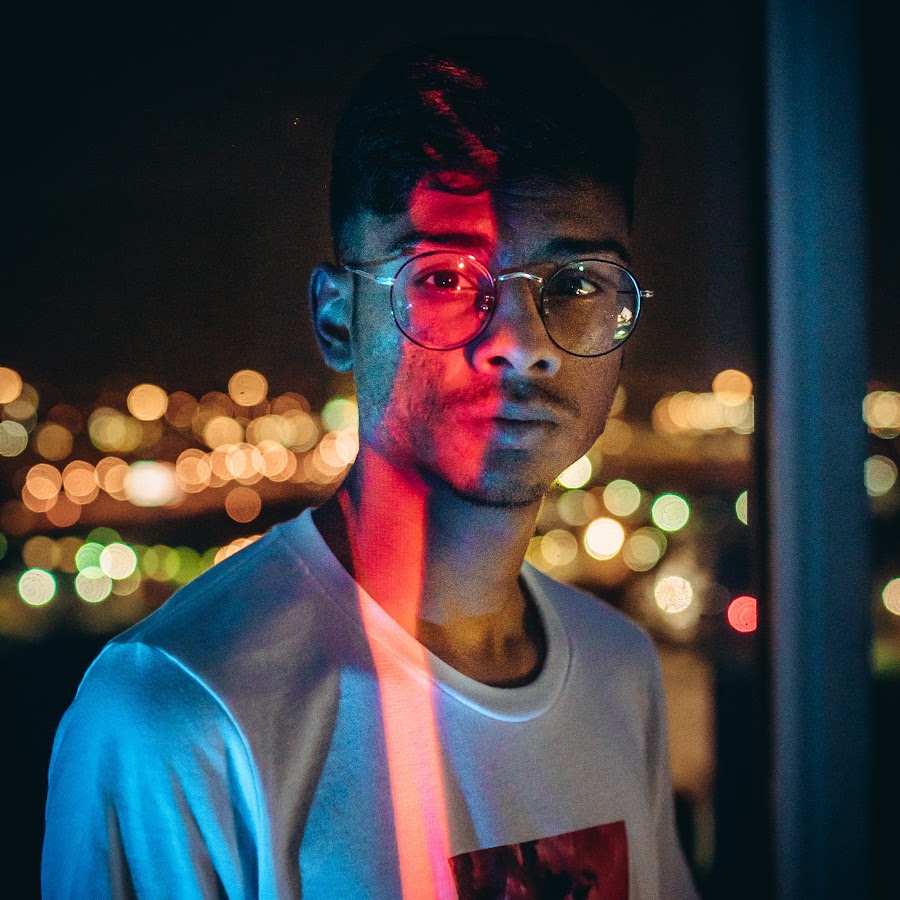
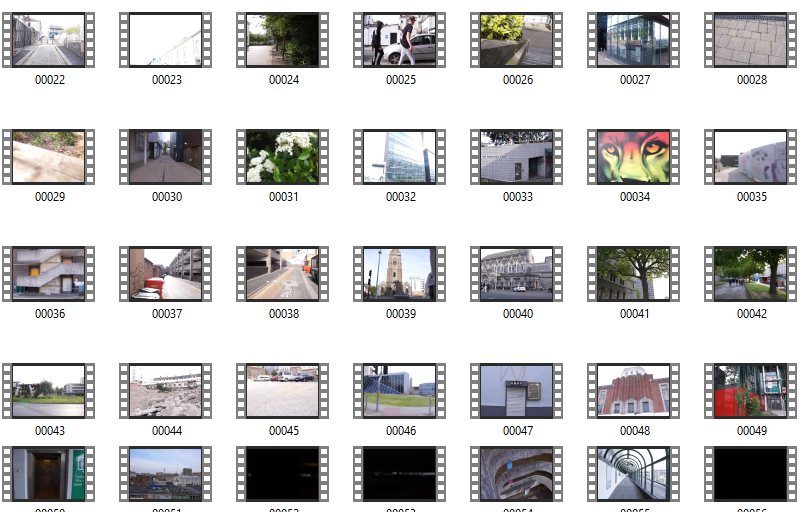
In order to emulate his shots I used a combination of my gimbal paired with Lily’s Sony a6000 and Sigma F1.4 DN Lens. I spent an evening in Plymouth filming varying shots and filming styles including; hyperlapses, panning, tilting and sliding movements. Most of my footage consists of architectural shots as I had no models or other subjects I could shoot in the city at that time. Some of the landscape shots panning across the city were interesting especially since they were shot from a high location.
Here is the video I have produced in order to further refine my skills with audio and video manipulation.
After shooting approximately 45 minutes of footage across that night it was time to start editing and condesing the footage into something much more watchable and interesting. I shortlisted my favoutite clips and then cut each one into 5-10 seconds of footage and added it to my timeline. When it comes to my edits I like for them to be coherent and fit together, even if there is no direct story being told. The reason for this is that the video has some sort of meaning or something which the audience wishes to explore by watching.
Next I worked on choosing a song beat which I felt fit the visual style I was looking for. Similar to the live session videos I wanted to produce something with a slower tempo and a chilled vibe, rather than hectic and face paced. The reason for this choice was that most of the footage wasn’t extremely dramatic and therefore would not match or resonate with intense music.
A youtube channel by the name of Fluidified I came across whilst searching for a fitting song for my edit. They proudly boast having the best enjoyed and chilled songs on youtube and this helped to refine my choices as the genre of music had been narrowed down into a small place for me to file through. After listening to many songs I came to a desicion on three different songs.
Music:
The first was “The only thing” by Phelian.
The reason i felt this was a good choice was, however the voices in the background i felt interrupted with the flow of the music and therefore made it unappealing to me in some aspects.
Another song in my list was Alone by Viren.
The main reason this song didn’t fit particularly well is because of the raindrops and ambient weather noises in the background. The footage I filmed did not include any dramatic weather or rain and would therefore make the video confusing or not make sense if there was audio but no footage of rain.
The song I finally chose was called “Way” by Ennja.
The crackling at the start of the audio track also creates a vintage looking sound which could be paired with digital noise or scratches in the edit to further engage the viewer within the video. Another thing I really liked about this piece of music was how tension was built very slowly and had minimal amount of vocals. The audio is a very important factor when pairing it with a chosen visual style as two contrasting pieces of art can often clash depending on how each style is carried out.
The swooping sounds before a hit-hat allowed enough time for me to add footage which was synced to the beat to create a more cohesive edit which is both appealing to the eyes and ears. Another factor which went into choosing the music was how similar it sounded to JR Alli’s piece.
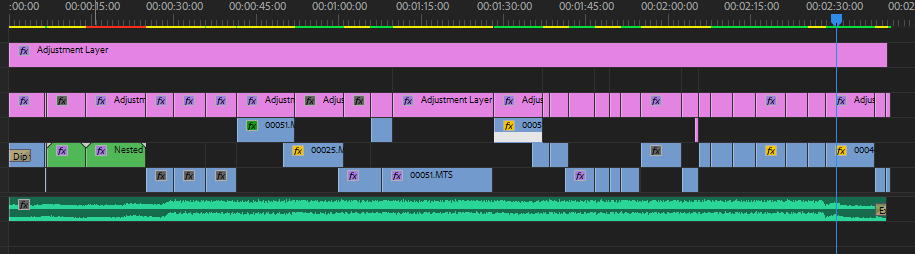
This was the final timeline after completing the edit.
The editing process contained three main elements. The first being organising the footage into a coherent order I was pleased with as mentioned above. The second was to add transitions to each of those shots, whether they were masked, presets or just simple cuts. And the third was adding colour grading and warp stabilisation to any clips that needed it. Overall this process took a few hours as I wanted to keep perfecting each scene until I felt there were little to no mistakes or inadequacies.
Fffects and transitions:
The transitions and effects I used in this edit were; colour tint, glitch transitions, warp stabilisation, luma keying, fading, masking and many other directional blur transitions.
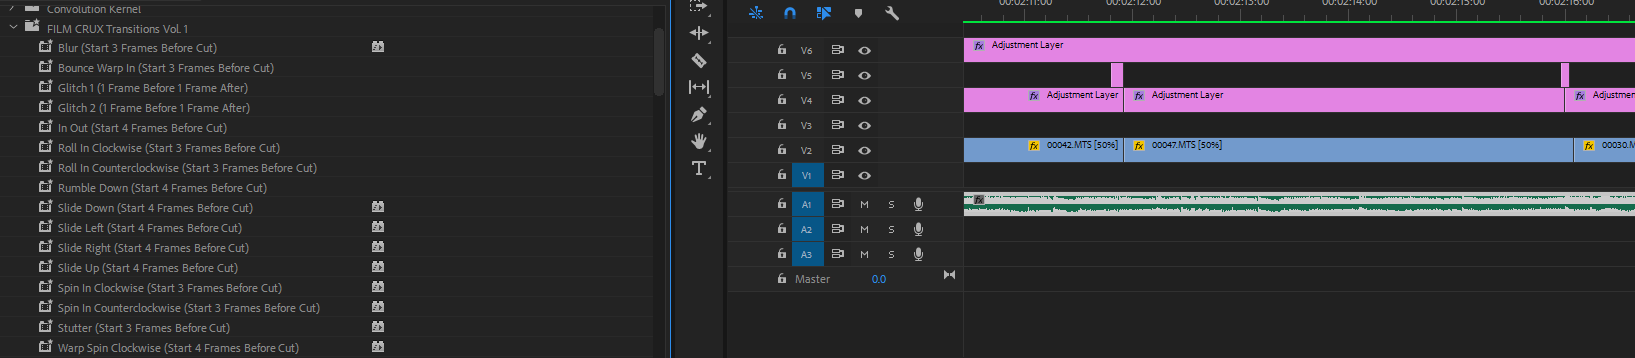
I researched on YouTube free preset packs to use in my edit to stylise the transitions in a similar way to JR Alli.
In this pack which I downloaded by entering my email I added this to the presets bin in Premiere and starting playing around and applying transitions I felt were most effective at conveying a professional yet calm looking visual style.
To add these effects it stated I should add the adjustment layer a few frames before or after each cut to get the desired effect. You can see in my timeline the short pink adjustment layers covering the area just before the cuts to apply the transition. These presets added predetermined keyframes for the speed of zooming, directional blurs and movement to create interesting looking results.
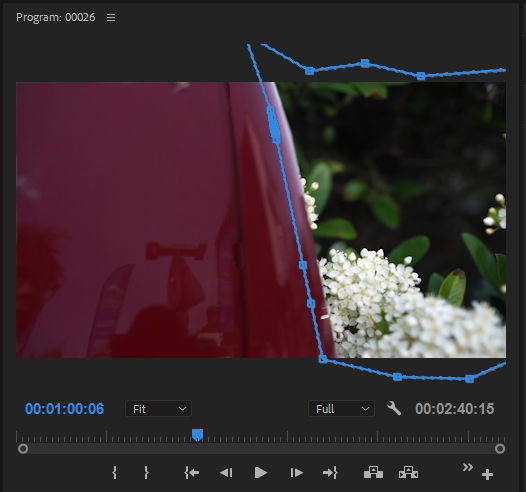
One of my favourite transitions in this edit is the use of masking. Masking is selecting an area in the frame in which you want to apply another layer or effect. In my edit I use the red van passing by as a transition by masking the background of another layer to the shape of the van to make the greenery appear from behind it.
I used key frames to adjust the mask’s in order for it to fit the shape of the vehicle.
Here you can see the key frames of the mask. In the edit timeline (pictured below) you can see the layer above the video of the greenery. This is why the mask is so important to allow for both clips to be shown at the same time.
Colour Grading:
In this edit I had to add a lot of colour balancing and exposure adjusting in order to get the lightness and tints I wanted. Here are a few screenshots of before and after images of colour grading and basic correction.
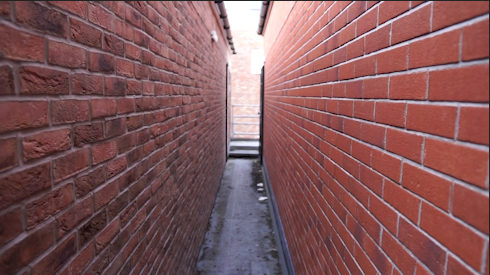
Before: After:
You can see by adjusting the shadows and exposure of the image, there is more definition in the background and the walls on either side have more contrast and deeper values overall making the shot look more impressive.
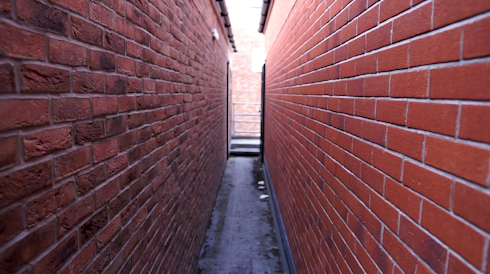
Before: After:
Here you can see again that there is a much higher dynamic range in the shot which makes it more visualising appealing. The colours of the grime on the walls is also more pronounced which add texture to the shot. This added texture gives a rougher and more dramatic looking shot especially when combined with the high angle it is being shot from.
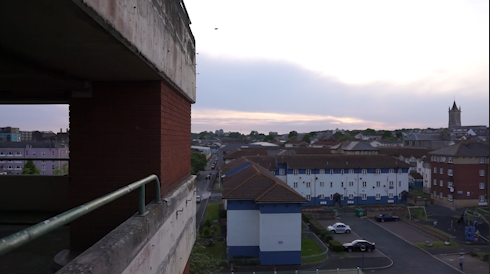
Before: After:
Whilst the shadows in this shot are slightly darkened from the exposure correction I think it creates more depth within the shot. The colours from a tint balance also “pop” and have a more defining edge to them. This once again creates a better aesthetic for the whole edit therefore making it more enjoyable and interesting to watch.
Edit Evaluation:
Overall I believe this edit was very successful at portraying Plymouth as a visually pleasing and interesting city. Also from creating this edit I have achieved my goals of researching and practising the art of colour grading, music selection and editing style.
For the FMP Tim and I were going to be filming a live sessions style video in a rural forest location in the countryside. Our two chosen locations were Plymbridge woods and bluebell woods in Ashburton. The reasoning behind these choices was that both these woods had a path alongside a river and had very beautiful trees throughout.
Here are some pictures of the woods in Plymbridge. I found that the area in the picture, located top right, had a good combination of ground and water in order to have Tim walking alongside with his guitar singing.
Originally we planned to create a live session video in 3 separate locations, each at a different time of day to represent the “day in the life” theme/title for the project. However now we have developed the idea and decided that using 3 separate locations would be too jarring for the viewer. Therefore we adapted the idea so that overall it would flow more cohesively.
In order to see what visual style or aesthetic my final film will take shape as I need to research and analyse multiple other live sessions music videos. A video I found on youtube produced by Hollow Coves has a very similar visual style compared to what I had written within my proposal.
The setting of this location, next to a lake in the outdoors, is a space I wanted to capture Tim playing his music within as I liked the raw and natural look playing the guitar and singing outside looked. A shallow depth of field has also been achieved in this live session, creating a sharp focus on the subject, separating the background from him and therefore making a visually pleasing video.
The teal / green colour grade of the video and the simplicity the location create a very minimalistic look which is something I would like to emulate for my FMP. The reason I want this specific colour grade is because blue/teal colours are usually connoted with calm or sad scenes in movies. Films use colour to manipulate the viewers emotions and therefore my deliberate decision to use this colour will subconsciously effect the viewer in a way their brain has almost been trained to do. The song Tim has written and produced is supposed to invoke a sad and strong emotional response as it is a story about the misuse of drugs and sad death of his friend.
Another aspect of this video I want to apply to my emulation is a constantly changing camera perspective. I felt that a static camera position for the duration of the live session would bore the viewer as there is no new information for the brain to focus on and therefore the overall success of the video would fail. Therefore a dynamically changing camera position would suit the live session edit much better.
This entire video shoot is filmed whilst Mac DeMarco is walking around with his guitar. DeMarco has inspired me to create a similar one shot style music video for one of Tim’s songs “A better cry”. I felt that because this would be a guitar instrumental it would be way easier to walk and play this song rather than having to sing at the same time as well.
However this entire video is shot in a more comical way as he is shown walking around carelessly and talking in a character with a seperate personality to his own. This style chosen by Mac is not similar to the live session video I want to create as Tim’s songs are more intimate and personal.
Here is another live session video filmed on the streets of Brighton starring the singer-song writers Ren and Sam. I personally love both of these artists and was shown this live session video by a friend in college. I love how live acts capture the raw emotion of someone and how the entire story sounds much more authentic when performed in real life.
You can see in this video the camera man has used a gimbal similar to how I want to shoot my video. He is also using a constantly changing camera angle and perspective to see more of the background and keep the shots more interesting/diverse.
The paintings of Caspar David Friedrich
Friedrich is a 19th century german landscape artist who produces stunningly beautiful paintings of the world.
His art has often been described as a drug and when a person views his images they “intended to produce an expanding state of consciousness in which the pain of immediate troubles is lessoned by a euphoric recognition of the immensity of nature and the cosmos.
Looking into the use of the outside world and how it effects our brains and feelings on the inside is something I am really interested in . The reason for shooting the live session video outside with Tim was that I wanted to replicate the same feelings Friedrich’s paintings invokes on people when they see his art.
The first final major project of year one has been set and it is time for me to merge all of the techniques and expertise gained throughout the duration of the course.
The initial brief given to everyone was titled “a day in the life.” This was a way to set everyone a starting block or inspiration in order to give everyone an opportunity to develop and focus their idea into something they have an interest in or want to produce.
Since this is the final project of the year this project had really been made so everyone can “show off” what they have learnt and really push themselves to research, plan, create and evaluate something great.
I recorded some clips and videos of topics I have an interest in throughout my day to day life. Some of these include; skating, listening to music, exploring, walking (urban and rural.) After recording these clips and editing them into a short video I decided my focus for this project would be music. The reason for this decision was based on how much music has influenced and developed who I am. It has sparked friendships and throughout college it became a more important factor in my life; helping me through problems and issues or just as a way to relax with friends and discuss our music interests and opinions.
As discussed in my project concept within my proposal I will be collaborating with a friend, Tim, in order to create a video orientated about music produced with the goal to inspire and put our names out there.
Throughout the duration of the course I have developed my skills in many different areas; filming, editing, animating and directing. At the start I only knew the basics of camera operating and editing softwares however after each passing unit my expertise has exponentially grown. Something which has greatly influenced me to starting this project is music. Beforehand I didn’t have a great interest in music but since starting college it has had a much greater influence in changing who I am than I thought. Because of this newfound love for music it has lead me to choosing a project revolving around music and exploring its effects/how it influences others.
Section 2: Project Concept (approx 200 words)
The concept of this project is a music video/live sessions for an EP my friend Tim is creating. His role in this project is to write, play and mix the songs whilst I have to film and edit the final product. We were planning on shooting in 3 different locations at different times of the day. Once at dawn, midday and dusk. During this three scenes Tim will be performing his written songs on his guitar and singing. The proposed idea was to conjoin these three scenes using stylistic transitions in order to make the video/edit different and interesting.
I have looked at a few similar acoustic singer music videos and for my edit I want to emulate some of their techniques and styles. For example; many use extreme wide angle or fisheye lenses for a distinct effect, others use low apertures in order to create bokeh and a shallow depth of field for a more aesthetically pleasing video.
Since I have purchased a handheld gimbal I would also like to include some sort of hyperlapse for the music video to have a more varied editing style.
Section 3: Evaluation (approx 50 words)
In order to successfully evaluate my work I will have to recognise that my original idea/proposal may change and develop throughout the course of the project. To see the stages of development I will produce a blog post each week to not only describe but also reflect and analyse the work done. After finishing my production I plan on creating a final evaluation which will look at the project as a whole rather than the changes in each passing week.
Updated Proposal 10/05/19
I have made a few small updates to my proposal as during the research stage whilst analysing more live session videos it changed the way I wanted to produce Tim’s music. Another reason I have updated the proposal is due to a location change and the way I would be showcasing the video has moved from a singular video to two separate edits.
Section 1: Rationale (Approx 100 words)
Throughout the duration of the course I have developed my skills in many different areas; filming, editing, animating and directing. At the start I only knew the basics of camera operating and editing softwares however after each passing unit my expertise has exponentially grown. Something which has greatly influenced me to starting this project is music. Beforehand I didn’t have a great interest in music but since starting college it has had a much greater influence in changing who I am than I thought. Because of this newfound love for music it has lead me to choosing a project revolving around music and exploring its effects/how it influences others.
Section 2: Project Concept (approx 200 words)
The concept of this project is a music video/live sessions for an EP my friend Tim is creating. His role in this project is to write, play and mix the songs whilst I have to film and edit the final product. Our plan was to shoot in one location; Plymbridge woods. Here Tim would sing on of his songs “Shooting up with all of your friends” and a separate instrumental called “A better cry.” The first location would require Tim to be sat down preferably in a clearing somewhere within the forest. The second would be filmed and performed whilst walking along a path in a one-shot style video.
I have looked at a few similar acoustic singer music videos and for my edit I want to emulate some of their techniques and styles. For example; many use extreme wide angle or fisheye lenses for a distinct effect, others use low apertures in order to create bokeh and a shallow depth of field for a more aesthetically pleasing video.
I was planning to use the gimbal I have purchased in order to improve the stability of the final edit to create a smooth looking live session video.
Section 3: Evaluation (approx 50 words)
In order to successfully evaluate my work I will have to recognise that my original idea/proposal may change and develop throughout the course of the project. To see the stages of development I will produce a blog post which I shall add to and update each week to not only describe but also reflect and analyse the work done. After finishing my production I plan on creating a final evaluation which will look at the project as a whole rather than the changes throughout the 8 weeks.
I think that there is no such thing as originality, whilst you may be able to come up with a unique idea almost everything has either been thought of or designed before by some other person. However, just because an idea may not be original does not mean it cannot be good. There are hundreds of movies based around the end of the world however each one explores it in a slightly different view/narrative in order to keep it interesting for the viewer. I think I would define originality as something produced or created which differs from the norm or what someone may consider stereotypical.
Shynola Vs Owen Trevor
There was a dispute between these two creative directors. Shynola and Owen trevor both created a video with similar art styles. Each one included a stop motion edit which incoperated chalk into the video. Owen Trevor then claimed that Shynola’s music video for a Coldplay song was playdurism based from the similarities of how the videos were created.
Shynola’s response clearly shows they are upset as they have been accused of playduirasm but in no way do they feel threatend by owen. Their email to him is written in a way that it would be ludicrus for Owen to continue his accusation of playduirasm as shynola show all of the influences which inspired them for their video. All of these inspirations and ideas were created/produced way before either of the chalk music videos and therefore show to both creators that claiming playdurism on such a broad idea and design princible is non-sensical.
I feel that whilst at first the claim Owen made was somewhat justified, due to him feeling at threat from someone “taking” his idea, the response from Shynola which shows their inspirations makes Owen’s claim seem completely unjustified.